How IRSA Works in EKS?

Breaking down IRSA in AWS EKS.
What is IRSA?
IRSA — IAM Role for Service Accounts is a way in EKS that provides containers running in EKS Pods a identity to access AWS API or AWS resources. IRSA leverages Kubernetes features such as projected volumes, ServiceAccount token volume projection and Service account issuer discovery so that application running inside the container can access AWS resources using AWS SDK.
What is Projected Volume?
In K8s, projected volume is something that maps several volume sources such as: secret, configMap, downloadAPI, serviceAccountToken into the same directory. Out of these what is necessary to understand now is ServiceAccountToken. An example would be like:
apiVersion: v1
kind: Pod
metadata:
  name: sa-token-test
spec:
  containers:
  - name: my-app
    image: busybox
    command: ["sleep", "3600"]
    volumeMounts:
    - name: token-vol
      mountPath: "/my-app-tokens"
      readOnly: true
  serviceAccountName: my-service-account
  volumes:
  - name: token-vol
    # projected volume
    projected:
      sources:
      # see here
      - serviceAccountToken:
          audience: api
          expirationSeconds: 3600
          path: token
When kubelet sees serviceAccountToken as a source for projected volumes, it fetches tokens from the TokenRequest API which is OIDC compatible JWT token. This token is used by containers to access K8s API.
    sequenceDiagram
    participant Pod
    participant Kubelet
    participant TRA as TokenRequest API
    participant API as API Server

    Kubelet->>Kubelet: Detects `serviceAccountToken` as projected volume source
    Kubelet->>TRA: Request token for ServiceAccount
    TRA->>TRA: Generate JWT with expiration
    TRA-->>Kubelet: Return signed token
    Kubelet-->>Pod: Mount token in volume

    Pod->>API: Authenticate with token
    API->>API: Validate token signature & expiration
    API-->>Pod: Grant access based on RBAC
What’s important to understand is that this token can also be presented to AWS STS in order to get temporary credentials to access AWS API which we will look next.
How IRSA Uses ProjectedServiceAccountToken?
As stated by AWS here, AWS uses ProjectedServiceAccountToken feature of K8s for IRSA:
In Kubernetes version 1.12, support was added for a new ProjectedServiceAccountToken feature. This feature is an OIDC JSON web token that also contains the service account identity and supports a configurable audience.
        - serviceAccountToken:
          audience: api
          expirationSeconds: 3600
          path: token
The audience field suggets “intended recipent” of this token and for IRSA it is sts.awsamazon.com (AWS Simple Token Service) because this token is ultimately pass to AWS STS to receive temporary credentials.
    sequenceDiagram
    participant WH as Pod Identity<br/>Webhook
    participant Pod
    participant Kubelet
    participant TRA as TokenRequest API
    participant OIDC as EKS OIDC<br/>Issuer
    participant STS as AWS STS
    participant S3 as AWS S3

    Note over WH,STS: One-time setup: IAM OIDC provider, role trust policy, SA annotation (role-arn)

    WH->>Pod: Inject token volume and env vars

    Kubelet->>Kubelet: Detects `serviceAccountToken` as projected volume source
    Kubelet->>TRA: Request token for ServiceAccount
    TRA->>TRA: Generate JWT with expiration
    TRA-->>Kubelet: Return signed token (aud: sts.amazonaws.com)
    Kubelet-->>Pod: Mount token in volume

    Pod->>STS: AssumeRoleWithWebIdentity (JWT + role ARN)
    STS->>OIDC: Fetch discovery doc and JWKS (from iss URL)
    OIDC-->>STS: Return public keys
    STS->>STS: Verify signature, iss, aud, sub vs trust policy
    STS-->>Pod: Return temporary AWS credentials
    Pod->>S3: Access with credentials
    S3-->>Pod: Grant access
The diagram is vague and seems complex at first which opens up several talking points — “what’s going on?” Therefore, let’s solve one mystery at a time and by the end everything will be vivid. To understand, what’s necessary is patience because first we have to understand “how the whole IRSA is setup to work” and only then move into “why this works”. First let’s start with the “how” and obviously we will talk about “why” for each step later.
How To Configure IRSA in EKS?
1. Create IAM OIDC Provider Object For Your Cluster
cluster_name=my-eks-cluster
# you get oidc_id because EKS host OIDC dicovery endpoint for each cluster
oidc_id=$(aws eks describe-cluster --name $cluster_name --query "cluster.identity.oidc.issuer" --output text | cut -d '/' -f 5)
# if output is returned here from the next commmand, you can stop OIDC creation because your IAM already has OIDC provider for cluster
aws iam list-open-id-connect-providers | grep $oidc_id | cut -d "/" -f4
# if the above output returns nothing, IAM doesn't have OIDC provider listed for your cluster yet so create one:
eksctl utils associate-iam-oidc-provider --cluster $cluster_name --approve
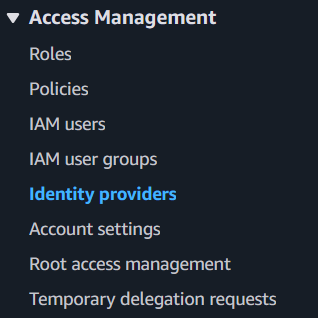
Obviously, you could have done this manually in IAM Identity Providers console:
2. Assign IAM Role
Merely creating IAM OIDC Provider object does nothing unless it has some role assigned. So Assign Role for it too:
# 1. create IAM policy file
cat > iam_policy.json << EOF
{
    "Version":"2012-10-17",
    "Statement": [
        {
            "Effect": "Allow",
            "Action": "s3:GetObject",
            "Resource": "arn:aws:s3:::my-pod-secrets-bucket"
        }
    ]
}
EOF

# 2. create IAM policy from the above policy file
aws iam create-policy --policy-name my-policy --policy-document file://iam_policy.json

# 3. create trust relationship for role
oidc_provider=$(aws eks describe-cluster --name my-eks-cluster --region $AWS_REGION --query "cluster.identity.oidc.issuer" --output text | sed -e "s/^https:\/\///")
cat > trust_relationship.json << EOF
{
  "Version":"2012-10-17",
  "Statement": [
    {
      "Effect": "Allow",
      "Principal": {
        "Federated": "arn:aws:iam::123456789012:oidc-provider/$oidc_provider"
      },
      "Action": "sts:AssumeRoleWithWebIdentity",
      "Condition": {
        "StringEquals": {
          "$oidc_provider:aud": "sts.amazonaws.com",
          "$oidc_provider:sub": "system:serviceaccount:$namespace:$service_account"
        }
      }
    }
  ]
}
EOF

# 4. create role
aws iam create-role --role-name s3-get-obj-role --assume-role-policy-document file://trust_relationship.json

# 5. associate/attach IAM policy to the role
account_id=$(aws sts get-caller-identity --query "Account" --output text)
aws iam attach-role-policy --role-name s3-get-obj-role --policy-arn=arn:aws:iam::$account_id:policy/my-policy
3. Annotate K8s Service Account
# create service account file
cat > my-service-account.yaml <<EOF
apiVersion: v1
kind: ServiceAccount
metadata:
  name: my-service-account
  namespace: my-namespace
EOF

# create (apply) service account for pod
kubectl apply -f my-service-account.yaml

# annotate your service account with the ARN of the IAM role that you want the service account to assume
export namespace=my-namespace
export service_account=my-service-account
account_id=$(aws sts get-caller-identity --query "Account" --output text)
kubectl annotate serviceaccount -n $namespace $service_account eks.amazonaws.com/role-arn=arn:aws:iam::$account_id:role/s3-get-obj-role
[Alternative (for 2,3) If You Already Have Service Account and IAM Role]
export namespace=my-namespace
export service_account=my-service-account
account_id=$(aws sts get-caller-identity --query "Account" --output text)
eksctl create iamserviceaccount --name $service_account  --namespace $namespace --cluster my-eks-cluster --role-name s3-get-obj-role \
    --attach-policy-arn arn:aws:iam::$account_id:policy/my-policy --approve
Either way now your service account is annotated with the role you created to access s3 api (GetObject):
apiVersion: v1
kind: ServiceAccount
metadata:
  name: my-service-account
  namespace: my-namespace
  annotations:
    eks.amazonaws.com/role-arn: arn:aws:iam::ACCOUNT_ID:role/s3-get-obj-role
4. Assign Annotated ServiceAccount To Pod
cat > my-deployment.yaml <<EOF
apiVersion: apps/v1
kind: Deployment
metadata:
  name: my-app
spec:
  selector:
    matchLabels:
      app: my-app
  template:
    metadata:
      labels:
        app: my-app
    spec:
      serviceAccountName: my-service-account
      containers:
      - name: my-app
        image: my-image:v1.2.3
EOF

kubectl apply -f my-deployment.yaml
How and Why IRSA Works?
Step 1: Pod Creation (Trigger Phase)
When you deploy a Pod that uses an annotated ServiceAccount (eks.amazonaws.com/role-arn: ...), the EKS Pod Identity Webhook intercept the request as it has been watching for EKS ARN Role annotated service account and modifies your Pod specification on the fly to inject a projected volume. This is documented here. Therefore, for Pod, a DevOps engineer doesn’t actually write the following part, it’s instead injected on the fly by AWS Pod Identity webhook:
### Everything below is added by the webhook ###
    env:
    - name: AWS_DEFAULT_REGION
      value: us-west-2
    - name: AWS_REGION
      value: us-west-2
    - name: AWS_ROLE_ARN
      value: "arn:aws:iam::111122223333:role/s3-reader"
    - name: AWS_WEB_IDENTITY_TOKEN_FILE
      value: "/var/run/secrets/eks.amazonaws.com/serviceaccount/token"
    - name: AWS_STS_REGIONAL_ENDPOINTS
      value: "regional"
    volumeMounts:
    - mountPath: "/var/run/secrets/eks.amazonaws.com/serviceaccount/"
      name: aws-token
  volumes:
  - name: aws-token
    projected:
      sources:
      - serviceAccountToken:
          audience: "sts.amazonaws.com"
          expirationSeconds: 86400
          path: token
Step 2: Kubelet Mounts the Volume (The “Issuance” Step)
This is the moment the token is generated. As the kubelet prepares to launch the container on the worker node:
- The
kubeletcalls the cluster’s internal TokenRequest API. - The Kubernetes API Server generates a cryptographic JWT signed by the cluster’s own internal private key.
- The
kubeletwrites this JWT file (OIDC Compatible) to a projected volume at/var/run/secrets/eks.amazonaws.com/serviceaccount/.
Step 3: The AWS SDK Requests Credentials (The Handshake Step)
Inside your container, your AWS SDK (e.g., boto3, AWS CLI) starts up. It looks at the environment variables injected by the webhook:
- It reads the JWT token file from disk.
- It calls the AWS Security Token Service (STS) endpoint using the
AssumeRoleWithWebIdentityAPI, passing the Kubernetes-generated JWT.
Step 4: AWS Validates via OIDC (The Trust Step)
Now AWS STS needs to know if this token is legitimate.
- AWS STS looks at the
iss(issuer) claim inside the JWT, which points to your EKS OIDC Issuer URL (hosted by AWS). AWS docs says:
Amazon EKS hosts a public OIDC discovery endpoint for each cluster that contains the signing keys for the ProjectedServiceAccountToken JSON web tokens so external systems, such as IAM, can validate and accept the OIDC tokens that are issued by Kubernetes.
This was possible because K8s says:
If you have enabled token projection for ServiceAccounts in your cluster, then you can also make use of the discovery feature. Kubernetes provides a way for clients to federate as an identity provider, so that one or more external systems can act as a relying party.
Therefore, please understand that EKS public OIDC discovery endpoint is not exactly working how OIDC Identity Provider works because generally OIDC IdP signs the token but here K8s TokenRequest API is signing token. So:
Important
The EKS OIDC provider does not actually issue or generate the token. Instead, the Kubernetes API Server issues the token using the TokenRequest API, and the EKS OIDC provider simply hosts the public keys required to validate it. Read more on this here and other topics on the same sidebar (AWS sidebar).
AWS STS makes a call to that EKS OIDC URL to fetch the cluster’s JSON Web Key Set (JWKS)—which are just the public keys of your Kubernetes cluster. Read more here.
AWS STS uses those public keys to verify that your cluster’s API Server was indeed the one that signed the token in Step 2. If the signature matches and your IAM Role trust policy allows it, AWS STS issues temporary AWS credentials back to your Pod.
Step 5: You Application Calls AWS API
Now, your application can use those temporary credentials to fetch resouces from AWS API based on what IAM policy attached to IAM Role has allowed to do.