Deploying a Static Site to AWS S3 and Cloudfront
GitHub Pages handled everything for you in the last chapter — hosting, HTTPS, a CDN, all invisible. This chapter deploys the exact same page to AWS instead, and the difference is the point: nothing is invisible anymore. You provision the bucket, you provision the CDN, you wire the permissions between them, and you’re the one paying for it if you forget to tear it down.
The Site, Again
Same file as the last chapter, same trick with the #target line — this time the workflow will stamp in AWS S3 + CloudFront instead:
<!DOCTYPE html>
<html lang="en">
<head>
  <meta charset="UTF-8">
  <title>devstuffs CI/CD practice</title>
  <style>
    body { font-family: system-ui, sans-serif; background: #0B0E14; color: #E4E2DC; display: flex; align-items: center; justify-content: center; height: 100vh; margin: 0; }
    .card { text-align: center; }
    code { color: #E8A33D; }
  </style>
</head>
<body>
  <div class="card">
    <h1>Hello from devstuffs 👋</h1>
    <p>This page was deployed by GitHub Actions.</p>
    <p><code id="target">deployment target: unknown</code></p>
  </div>
</body>
</html>
The Architecture You’re Building
The instinct a lot of tutorials follow is “turn on S3 static website hosting and make the bucket public.” Don’t do that. AWS’s own current guidance is to keep the bucket private and let CloudFront be the only thing that can read it, using a feature called Origin Access Control (OAC). CloudFront gets a signed, scoped-down permission to fetch objects from your bucket; the public internet gets nothing directly from S3 at all.
    flowchart LR
    U[Visitor's browser] -->|HTTPS| CF[CloudFront distribution]
    CF -->|OAC-signed request| S3[(Private S3 bucket)]
    GH[GitHub Actions workflow] -->|aws s3 sync| S3
    GH -->|invalidate cache| CF
Provisioning the Bucket
Create the bucket itself from the CLI — this part is simple enough not to need the console:
aws s3api create-bucket \
  --bucket devstuffs-cicd-practice-yourname \
  --region us-east-1
Note
S3 bucket names are globally unique across all AWS accounts, not just yours — append your own name or a random suffix, the same way you did with the TestPyPI package name in a later chapter.
Leave Block Public Access switched on (it’s on by default for new buckets) — with OAC, the bucket never needs to be public, so there’s no reason to weaken that setting.
Provisioning CloudFront with OAC
This part is easiest to walk through in the console, since it’s a one-time setup you won’t repeat in CI:
- Open the CloudFront console → Create distribution.
- Origin domain: select your bucket from the dropdown (choose the S3 bucket endpoint, not a website endpoint).
- Under Origin access, choose Origin access control settings (recommended) → Create control setting, accept the defaults, and select it.
- Viewer protocol policy: Redirect HTTP to HTTPS.
- Default root object:
index.html. - Create the distribution. CloudFront will show a banner saying the bucket policy needs updating — click Copy policy, then follow the link to the bucket’s Permissions → Bucket policy and paste it in. It’ll look like this, with your own bucket name and distribution ARN filled in:
{
  "Version": "2012-10-17",
  "Statement": [
    {
      "Sid": "AllowCloudFrontServicePrincipalReadOnly",
      "Effect": "Allow",
      "Principal": { "Service": "cloudfront.amazonaws.com" },
      "Action": "s3:GetObject",
      "Resource": "arn:aws:s3:::devstuffs-cicd-practice-yourname/*",
      "Condition": {
        "StringEquals": { "AWS:SourceArn": "arn:aws:cloudfront::<account-id>:distribution/<distribution-id>" }
      }
    }
  ]
}
The distribution takes a few minutes to deploy for the first time. Once it’s “Enabled” and no longer “Deploying,” note its distribution ID (looks like E1A2B3C4D5E6F7) and its domain name (d111111abcdef8.cloudfront.net) — you’ll need both.
Storing AWS Credentials as Repo Secrets
Create an IAM user (or use an existing one) with permissions limited to this bucket and this distribution — s3:PutObject, s3:DeleteObject, s3:ListBucket on the bucket, and cloudfront:CreateInvalidation on the distribution is enough; don’t hand the workflow your full admin keys.
Your policy should look similar to:
{
    "Version": "2012-10-17",
    "Statement": [
        {
            "Sid": "VisualEditor0",
            "Effect": "Allow",
            "Action": [
                "cloudfront:CreateInvalidation"
            ],
            "Resource": [
                "arn:aws:cloudfront::<your-account-id>:distribution/<distribution-id>"
            ]
        },
        {
            "Sid": "VisualEditor1",
            "Effect": "Allow",
            "Action": [
                "s3:PutObject",
                "s3:ListBucket",
                "s3:DeleteObject"
            ],
            "Resource": [
                "arn:aws:s3:::<your-bucket>",
                "arn:aws:s3:::<your-bucket>/*"
            ]
        }
    ]
}
Generate an access key for that user, then add these as repo secrets:
AWS_ACCESS_KEY_IDAWS_SECRET_ACCESS_KEY
Note
Long-lived access-key secrets are the straightforward way to authenticate here, and they’re what this chapter uses. A later chapter in this course shows a way to let GitHub Actions authenticate to AWS without storing any long-lived keys at all — worth knowing that path exists, even though it isn’t covered yet.
The Workflow
name: Deploy to S3 + CloudFront

on:
  push:
    branches: [main]
  workflow_dispatch:

permissions:
  contents: read

env:
  S3_BUCKET: devstuffs-cicd-practice-yourname # your bucket
  CLOUDFRONT_DISTRIBUTION_ID: E1A2B3C4D5E6F7 # your id

jobs:
  deploy:
    runs-on: ubuntu-latest
    environment:
      name: aws-s3-cloudfront
      url: https://d111111abcdef8.cloudfront.net # your url
    steps:
      - name: Checkout
        uses: actions/checkout@v6

      - name: Stamp deployment target
        run: |
          sed -i 's/deployment target: unknown/deployment target: AWS S3 + CloudFront/' index.html

      - name: Configure AWS
        uses: aws-actions/[email protected]
        with:
          aws-access-key-id: ${{ secrets.AWS_ACCESS_KEY_ID }}
          aws-secret-access-key: ${{ secrets.AWS_SECRET_ACCESS_KEY }}
          aws-region: us-east-1
          mask-aws-account-id: true # mask account id in logs

      - name: Sync site to S3
        run: aws s3 sync . "s3://${S3_BUCKET}" --exclude ".git/*" --delete

      - name: Invalidate CloudFront cache
        run: |
          aws cloudfront create-invalidation \
            --distribution-id "${CLOUDFRONT_DISTRIBUTION_ID}" \
            --paths "/*"
The --delete flag on aws s3 sync matters more than it looks: without it, files you remove from the repo would just keep sitting in the bucket forever, quietly served by CloudFront. The invalidation step matters too, for a different reason — CloudFront caches aggressively at edge locations, so without it your workflow can succeed, the bucket can be correct, and visitors can still see the old page for hours.
Verifying the Deployment
Open the CloudFront domain name from your distribution (or the URL you set on the environment: block). You should see the card with deployment target: AWS S3 + CloudFront. You can also curl https://prefix.cloudfront.net to verify.
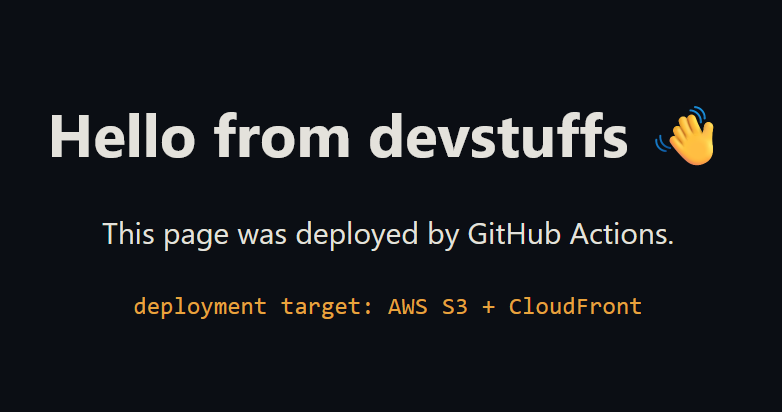
If you see a 403 instead, it’s almost always the bucket policy — double check the AWS:SourceArn condition matches your actual distribution ARN exactly.
Solving Access Denied Problem
If you forget to add index.html to root path, you may get error like:
<Error>
<Code>AccessDenied</Code>
<Message>Access Denied</Message>
</Error>
The fix is to add index.html to the root path for cloudfront.
Cleanup
Unlike GitHub Pages, this chapter’s resources cost money for every hour they exist, even sitting idle. Tear them down when you’re done experimenting:
# delete objects
aws s3 rm "s3://devstuffs-cicd-practice-yourname" --recursive
# delete bucket itself
aws s3api delete-bucket --bucket devstuffs-cicd-practice-yourname
Tip
You can keep accessing your site even after bucket removal until it’s cached in CloudFront and CloudFront itself is not disabled/deleted.
For CloudFront, you can’t delete a distribution while it’s enabled — disable it first, wait for that change to finish deploying (a few minutes), then delete it:
# get etag
etag=$(aws cloudfront get-distribution-config --id E123456 | jq '. | .ETag')
# get current config
aws cloudfront get-distribution-config --id E123456 | jq '. | .DistributionConfig' > config.json
# edit dist-config.json: set "Enabled": false, in relevant section
# -----------------------------------
# "DefaultRootObject": null,
# "PriceClass": "PriceClass_All",
# "Enabled": true,  <-- Set to false
# -----------------------------------
# update to disable
aws cloudfront update-distribution --id E123456 --if-match "$etag" --distribution-config file://config.json
# list subscriptions (note etag and arn of cloudfront subscription plan)
aws pricing-plan-manager list-subscriptions
# cancel relevant cloudfront subscription
aws pricing-plan-manager cancel-subscription --arn <arn>  --if-match <eTag>
# wait until the distribution's status shows "Deployed" again, then:
# note new etag
new_etag=$(aws cloudfront get-distribution-config --id E123456 | jq '. | .ETag')
aws cloudfront delete-distribution --id E1A2B3C4D5E6F7 --if-match "$new_etag"
It requires these many steps to delete CloudFront from CLI, you may sometimes use console for the exact reason.
Warning
The disable-then-delete dance for CloudFront isn’t optional — the API will simply reject a delete on an enabled distribution. Budget a few minutes of waiting between the disable and the delete.
Warning
Remove your ACCESS KEY from Github and Delete it from AWS too as long lived credentials are prone to greater risk.